Resource Groups (Resource Manager)
Your entire district uses the same resource tree. But, not everyone needs access to the whole thing. And even users who need full access to one part of the tree may only need limited access to another part.
For example, the textbook administrator needs all permissions for textbooks. And because the school uses 1:1 devices, access to circulate technology resources is also needed.
The Destiny Administrator and a district user with the right to Manage Resources for the District are the only users that can set up resource groups. These groups control which resources an access level can search, view, add, inventory and report on.
District users with the right to Manage Resources for the District are in the All Resources resource group by default. The Destiny Administrator can now assign them to an existing group, or set up a new group to assign them to. Then, district users can only search the district for, view, add, inventory and report on resources in that group.
|
Note: If a district user has the Allow site access permission, when in a site, their access adheres to the site access level granted. This means they could potentially have access to all or different resources at the site level than they do at the district. |
Create Resource Groups
Before you can configure access levels to grant access to one or more resource groups, you have to create these groups:
- Log in as the Destiny Administrator or a district user.
- Do one of the following:
If you want to... Then... Set up resource groups as a Destiny Administrator
- Select Setup > District Options sub-tab.
- Next to Access Levels, click Edit.
- Next to an access level, click
 .
. - On the Resources sub-tab, click Setup.
Set up resource groups as a district user with the Manage Resources for the District permission
- Select District, and then Catalog > Add Resource > Edit Templates.
- Scroll to the bottom of the page, and select Template Groups.
Note: The All Resources group can potentially give patrons access to the entire template tree. It is the default group and cannot be edited or deleted.
- Select Setup > District Options sub-tab.
- Click Add Group.
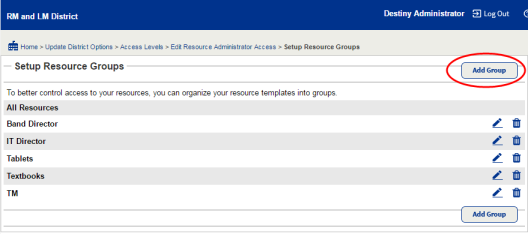
- In the Resource Group field, type a name for the resource group.
- In the resource tree, use the checkboxes to select the resources the patrons can view. To select an entire group, click Select All; to deselect an entire group, click Clear All.

- Click Save.
- Continue to do this for each resource group you want to create.
Edit Access Levels and Permissions
After creating resource groups, you can edit access levels and enable permissions for these groups.
- Log in as the Destiny Administrator or a site-level administrator.
- Do one of the following:
If you want to... Then... Edit access levels as a Destiny Administrator
- Select Setup > District Options sub-tab.
- Next to Access Levels, click Edit.
Edit access levels as an Administrator
Select Admin > Access Levels.
- Select Setup > District Options sub-tab.
- Next to an access level, click .
- On the Resources sub-tab, select a resource group from the drop-down.
- In that column, use the checkboxes to select the appropriate permissions.
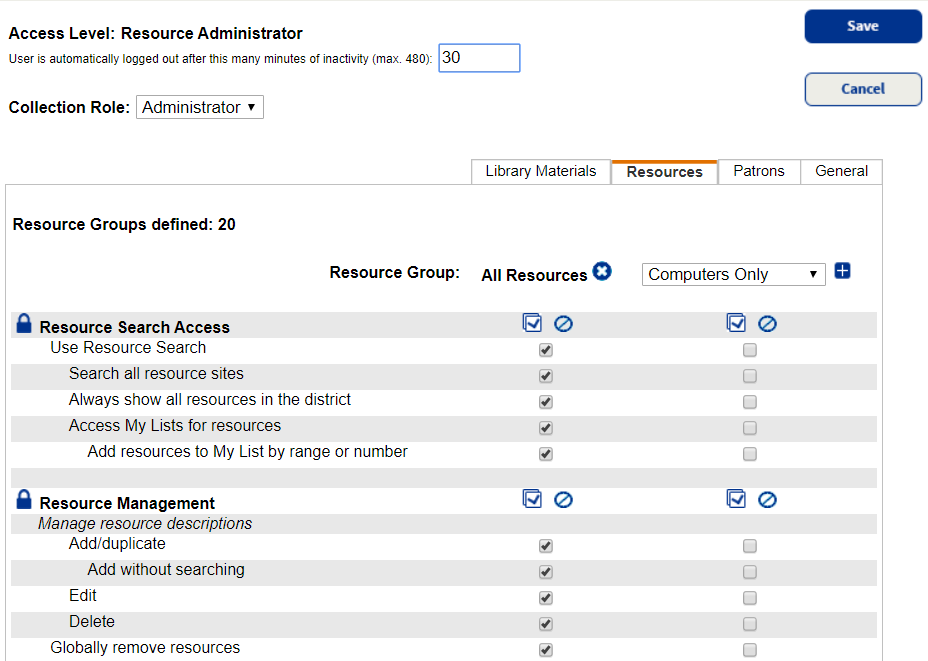
Note: For users who need access to another part of the tree, select another resource group, and then choose the appropriate permissions.
- Click Save.