Conduct an Inventory (Resource Manager)
Conducting a resource inventory lets you know where your resources are, what you have and what is missing.
If you limit an inventory to only textbooks, then you can also limit the inventory counts for the year adoptions end.
Each site can conduct an inventory of its resources and generate inventory reports. Also, the district resources manager can initiate a district-wide inventory, monitor its progress and generate district-wide inventory reports.
|
Note: When an item is counted:
|
Inventory Barcoded and Unbarcoded Items
Whether your inventory includes barcoded or unbarcoded items, the goal is to account for as many items as possible. You can confirm the status and location of all resources by conducting an inventory. When inventorying unbarcoded and consumable items, you enter a count instead of scanning barcodes.
|
Important: Unbarcoded items and consumables that are checked out are automatically accounted for. If they are checked in during inventory, they remain accounted for. |
- Start an inventory that includes barcoded, unbarcoded and/or consumable resources.
- Select Admin > Inventory > Resources sub-tab.
- In the Resource Inventory drop-down, ensure the correct inventory is showing.
- Do one of the following:
- Inventory barcoded items
- Click Account for each Barcode. Barcode fields appear.
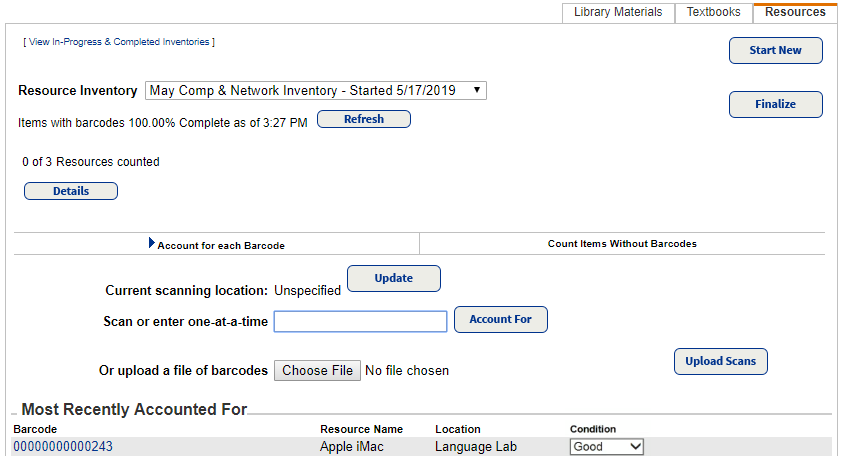
- To have Destiny confirm you are entering barcodes in the resource's designated location, click Update, and then select your current scanning location.
- In the Scan or enter one-at-a-time field, type or scan each barcode.
Notes:
- If you type barcode numbers rather than scan them, click Account For or press Enter after each entry.
- When you scan or enter unaccounted-for barcodes, Resource Manager changes the item’s inventory status to Accounted for.
Once you enter a barcode, the item appears in the Most Recently Accounted For section. The barcode links to item status.
Notes:
- To view an item's status, the View resource item status permission must be enabled.
- Based on how you configure Resource Options under Circulation in Admin > Site Configuration, "Lost" textbook resources must be returned in a timely fashion to generate a refund. Resource Manager does the following:
- Changes the status of a lost item to Available and deletes any fine charged to a patron for the lost resource.
- Creates a refund if the fine was paid.
- To upload a file of barcodes scanned offline with Follett Remote or another device, next to Or upload a file of barcodes, click Choose File (or Browse, depending on your browser).
- To change the Condition, use the drop-down.
- Click Account for each Barcode. Barcode fields appear.
- Inventory Unbarcoded Items
- Click Count Items Without Barcodes. A Resource table appears.
- In the Inventory Count field, type the count for each resource listed.
Note: Follett recommends periodically clicking Save to retain entered amounts. You can always update saved counts.
- Inventory barcoded items
- When you are done, click Finalize. A confirmation pop-up appears.
- Select accordingly, and then click Yes.
For more information, see FAQs (Resource Manager Inventory).
|
Note: In Resource Manager, you can only access the resources you have permission to view. |