Advanced Configuration Options for the Patron Import Converter
This document outlines CUSTOM formats and other available options for converting CSV information to XML data. It assumes you have your CSV and patronimportconverter.exe files available.
- In your working folder, double-click PatronImportConverter.exe.
- To select the CSV file, click Browse, and then find and select the file.
- Click the Field Mapping tab.
Enter Custom Mapping and Formatting
For a field whose values require special formatting, concatenation or added text, select CUSTOM in the Format column.
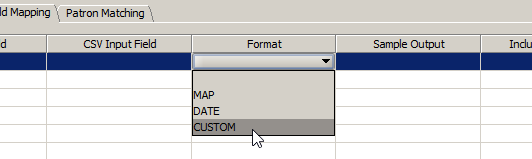
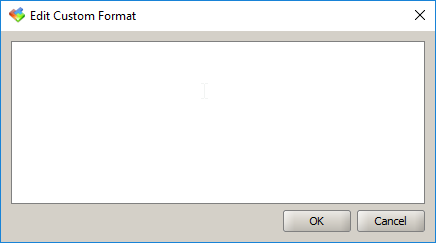
The Edit Custom Format pop-up appears.
|
Important: Do not add quotation marks or CDATA statements. The PIC inserts the necessary CDATA statements into the XML file. |
Use Literal Fields (Static Fields)
Literal fields are fields where the data does not change. You can type an entry, and it will apply to all patrons that are processed through the Patron Import Converter.
|
Example: You only have one site in Destiny and do not have the required Site Short Name field in your CSV file. Each patron will be in Main Street High School (Site Short Name = MSHS).
All patrons will be given a MSHS Site Short Name in the XML. |
Combine Fields (Concatenation)
You can combine fields in the Edit Custom Format pop-up. Each field can be referenced by the column number assigned to it. To reference the field number, wrap it in braces { }.
|
Examples:
|

Map Empty Fields
To have the PIC insert the contents of another field when it encounters an empty field, use the ISEMPTY command on a separate line. Be sure to specify all parts of the command:
- The ISEMPTY command
- The field to evaluate
- The field to insert if the evaluated field is blank
- The field to insert if the evaluated field is not blank
|
Example: In this example, if Field 7 is blank, the PIC will populate it with the contents of Field 6. Otherwise, it will populate Field 7 with its own contents: ISEMPTY({7},{6},{7}) Let's say Field 7 contains the patron's nickname, and Field 6 contains the patron's first name. ISEMPTY({7},{6},{7}) would prompt Destiny to show the nickname when it is available and the first name if it is not.
|
Use and Combine Partial Fields
Substring is a programming function that takes two values. The first value is a character location, and the second is how many characters to keep from that starting location.
|
Note: Working with substrings can be complicated and may require some trial and error. |
To work with parts of a field in the Patron Import Converter, you can use the substring command. This command lets you use a portion of a CSV field to make another field. The amount of characters is not variable. You must specify a starting character that will be used every time. To use this, you will need the parts of the command in this order:
- The field number
- The word "substring"
- The letter or number to start at (counting from left)
- How many characters to use from that starting point
|
Examples:
|