Scan/Load Library Inventory Barcodes
An inventory lets you track the location and status of library materials, as well as identify missing or damaged items. You can use a library inventory to identify any gaps in your collection and plan for future purchases.
To conduct an inventory, enter the barcode of each copy in your collection.
You can create a list of barcode numbers in a number of different ways. Each time a copy's barcode number is submitted to Destiny, the copy is marked accounted-for and no longer shows up as unaccounted-for when you run an in-progress inventory report.
Manually Enter Barcodes
To scan barcode numbers directly into Destiny:
- Select Admin > Inventory.
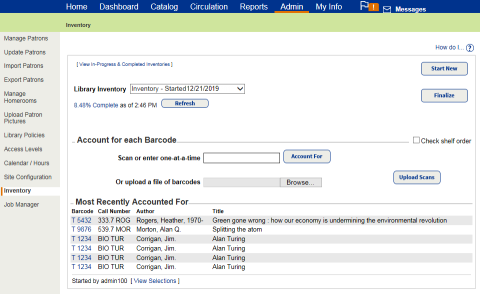
- Ensure the correct inventory shows in the Library Inventory drop-down.
- To have Library Manager confirm the order you enter barcodes is the correct shelf order, select the Check shelf order checkbox.
- Type or scan each barcode in the Scan or enter one-at-a-time field.
Notes:
- If you type in barcode numbers, click Account For or press Enter after each entry.
- If you enter a barcode out of call number order, an alert message appears at the top of the page.
- When you scan or enter unaccounted-for barcodes, Library Manager changes the item’s status to accounted-for and does one of the following:
- Changes the status of a Lost copy to Available.
- Checks in books that had a Checked Out status and deletes any fine charged to a patron for the lost copy. If the fine was paid, Library Manager creates a refund.
After you enter a barcode, it appears in the Most Recently Accounted For section. The barcode links to copy status.
Note: To view a copy's status, the View library item status permission must be enabled.
Upload a Barcode File
Use the following steps to upload a file of barcodes scanned offline with the
- Select Admin > Inventory.
- Next to the Or upload a file of barcodes field, click Browse or Choose File, depending on your browser.
- Find the barcode file, select it, and click Open.
- Click Update Scans. A message lets you know the job will be available in Job Manager.
The Job Summary shows an entry for every barcode number in the uploaded file, including any that have exceptions.