Assign Resources to Classes
Assigning resources to classes and sections makes it easy to ensure every student has the resources they need the first day of class. Additionally, your school and district can have better visibility of resource shortages and surpluses.
It is strongly suggested that classes and class/
Follett recommends that
Note: This feature applies to Destiny Resource Manager and Destiny Textbook Manager.
Assign a Resource with a Class or Section
- Log in to your district.
- Select District > Admin > Update Classes > Class Setup sub-tab.
- Find the class you want to assign resources to, and then click
 .
. - Find the section, click .
- Next to Resources, click Update.
- From the Find drop-down, select the type of resource you want to assign.
- Type your search term in the field, and then use the in drop-down to select which field to search.
- Click Go.
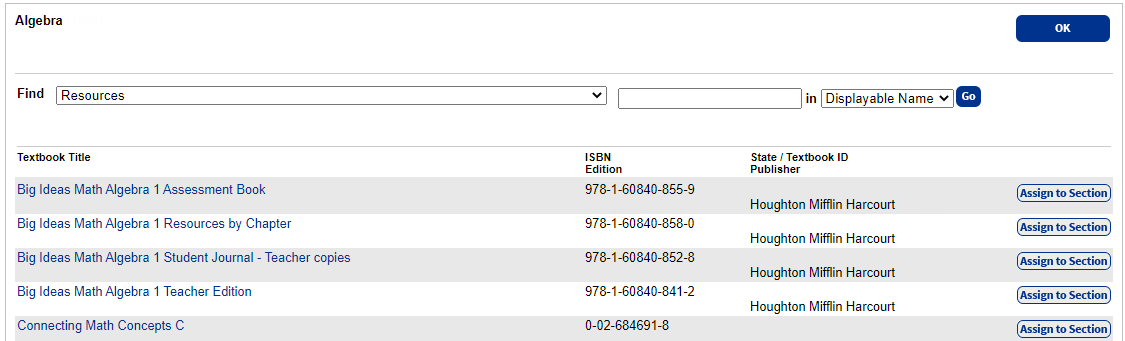
- Next to the resource, click Assign to Section. Repeat as needed.
- When you are done assigning resources, click OK.
To Assign Resource Groups to Classes
- Select District > Admin > Update Classes > Class Setup sub-tab.
- Next to the class you want to assign resources to, click .
- Click Update Resources.
- In the
Assign resources to class
section, do one of the following:If you want to update… Then… Resources separately - Select individually.
- From the Find drop-down, select the type of resource you want to assign.
- Type a search term, and then click Go.
- To assign a resource to a class, click Assign to Class. A pop-up appears.
- Select accordingly, and then click OK.
The resources appear in the Currently Assigned Resources section.
Resources as part of a group - Select as part of a group. The groups appear.
- To assign a group to a class, click Assign to Class.
- Click OK.
The groups appear in the Currently Assigned Groups section.
|
Important: If you assign any digital materials with the Instructional Classification of "Digital Material - Auto Circ (never barcode)" to the class or section, Destiny does the following:
|
To assign students to a class or section
- Log in to your site or district.
- Select Admin > Update Classes.
- Use the following table to select the class or section to assign a student to:
If you are logged in to… Then… A site - Next to the class or section you want to
assign a student to, click .
- Next to Students, click Update.
The district - Next to the class section you want to
assign a student to, click .
- Next to the section the student will join, click .
- Next to Students, click Update.
- Next to the class or section you want to
assign a student to, click
- In the Find Student field on the Update Students page, type your search term, and then use the in drop-down to select which field(s) to search.
- Click Go.
- Next to the student you want to assign to this class or section, click Assign to Section.
- When you are done, click OK.
To assign teachers to a class or section:
Follett recommends assigning teachers to classes and sections using the Class Import Converter. However, sometimes teachers are reassigned last minute – so you need a way to manually assign a teacher to a class or section.
- Log in to your site or district.
- Select Admin > Update Classes.
- Use the following table to select the class or section to assign a teacher to:
If you are logged in to… Then… A site - Next to the class or section you want to
assign a teacher to, click .
- Next to Teacher, click Update.
The district - Next to the class you want to
assign a teacher to, click .
- Next to the section the teacher will teach, click .
- Next to Teacher, click Update.
- Next to the class or section you want to
assign a teacher to, click
- In the Find Teacher field on the Update Teacher page, type your search term, and then use the in drop-down to select which field(s) to search from.
- Click Go.
- Next to the teacher you want to assign to this class or section, click Assign to Section.
Note: A confirmation message appears if there is already a teacher assigned to this class or section. To confirm you want to assign the new teacher you selected, click Yes.
- When you are done, click OK.