Library
Check In
When you check in copies you can, at the same time, gather data on used copies.
Check In a Library Copy
Properly checking in materials lets you track materials, assess any necessary fines, and collect circulation statistics.
- Select Circulation > Check In.
- To track the use of items that were used in the library but not checked out, select the Record in-library use checkbox.
- To check in off-site items, including copies with a status of checked out or lost, select the Check in off-site copies checkbox.
Notes:
- Only off-site items with a status of checked out or lost can be checked in at another site in the district. A message will let you know the item should be returned to the site.
- The Destiny Administrator must disable Allow copies to be checked in at any site (Setup > Sites sub-tab, and then edit the district) for this checkbox not to appear.
- To check in copies that have a status of In Quarantine, select the Check in quarantined copies checkbox.
Note: The Destiny Administrator must set the number of days to quarantine copies. And if sites are allowed to opt out of quarantine, they must not do so for this checkbox to appear. Users also need the Override library blocks permission. - Scan or type the barcode number of an item in the Find Copy field.
Notes:
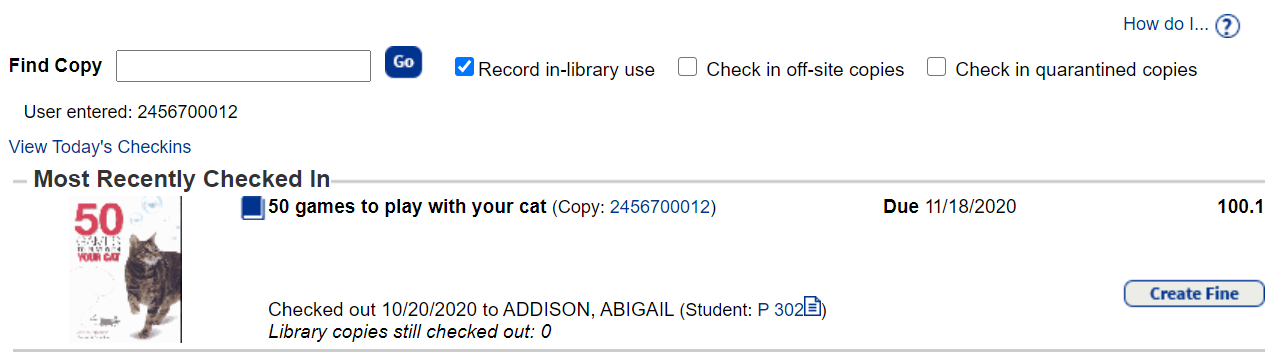
- In the Most Recently Checked In section, you can see the item’s title, barcode number, due date, patron’s name, and other information.
- If you have the ability to check in off-site barcodes and a barcode is duplicated across the district, a list of the copies with that barcode appears. If you select a copy from another site, a message appears showing the item must be returned to that site.
After you check in an overdue item, a message confirms the fine amount charged to the patron.

- If a book is damaged and you want to add a fine to the patron's record, click Create Fine.
- To continue checking in books, scan the next item's barcode in the Find Copy field.
Email hold notices: For instructions on how to set up email hold notices, see Set up email hold notices in Library Holds. Once these steps are successfully completed, a link appears.
Today's checkins: To view a list of the day's checkins, click the View Today's Checkins link. See View Today's Checkins.
The report:
- Sorts by time, with the first checkin of the day first.
- Deletes checkins of temporary copies when they are checked in.
- Does not include uploads from offline circulation.
For more help, free online training, webinars and educational resources, check out Follett Community.