Library Holds and Interlibrary Loans
It is not always possible to have enough copies of popular titles for every patron who wants one. Using Library Manager to place holds for the first-available copy, or reserve a copy for specific dates, helps your patrons get the titles they want and need.
Find the Patron
- Select Circulation > Holds/ILL.
- To select the patron requesting the hold, scan their barcode in the Find Patron field, or type a patron's name.
- To search for patrons throughout the district, deselect the Only my patrons checkbox.
- To search a particular field in the patron record, select Only search and the associated field from the drop-down.
- To search for active patrons, select the Only Active Patrons checkbox.
- Click Go. If your search returns a list of patrons, click the name of the patron requesting the hold.
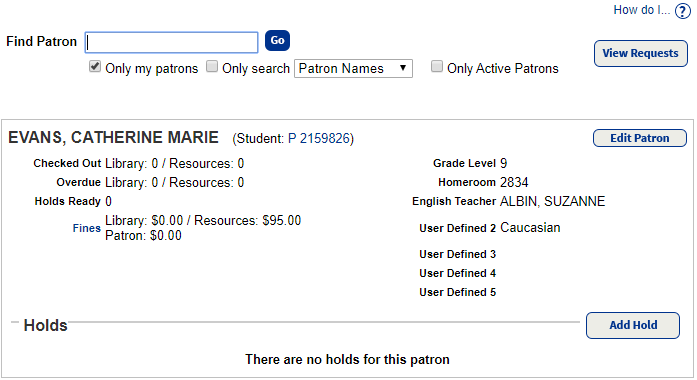
- Click Add Hold.
Add a Hold, ILL or Reserve
Your patrons might need resources from your library and ask you to hold them.
- On the Hold Request page, in the Find drop-down, select the field to search.
Note: If you enter a barcode number, Destiny searches only your library.
- In the next field, enter the item you are requesting.
- From the in drop-down, select the location where Destiny should search.
- Click Go.
- From the Search Results list, click either the title of the item you are requesting or Hold It.
- In the Requesting section, select when you want the item.
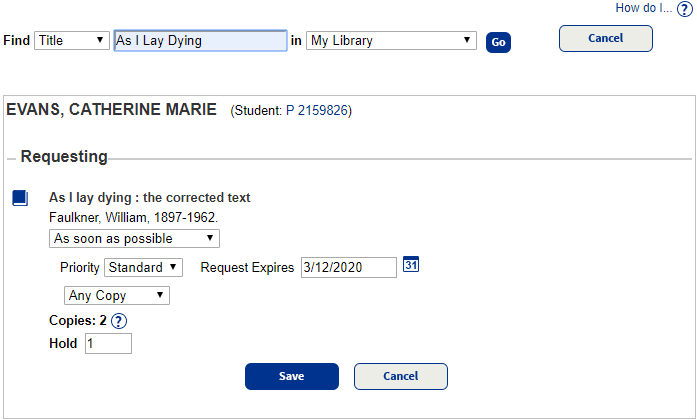
The final steps to place a hold request depend on which option you chose in the Requesting section.
Update Local Requests
You may need to update local hold requests for a patron.
View Holds on Title
Click the View icon, ![]() , to see the hold queue on the Holds On Title page.
, to see the hold queue on the Holds On Title page.
In the queue, you can:
- Delete a Ready hold
- Delete a reservation (You cannot edit the expiration date; you must delete the reservation and create a new one.)
- Create a new hold for the title.
- Reactivate an expired hold.
Note: You cannot make an expired reserve active; you must create a new reserve.
For ILL requests, you can:
- Change the expiration date for a Pending ILL request for your materials.
- Delete a Pending ILL request for your materials
- Change the expiration date for a Ready ILL request for your materials.
- Delete a Ready ILL request for your materials.
Note: You cannot edit an ILL Request to be filled by other sites.
For steps, see Holds on Title.
Additional Details
Check Out an ILL Copy
Retrieve the patron in Holds/ILL, click ILL Checkout and follow the ILL Requests steps to receive the material.
Edit a District Media Booking Request
To edit a district media booking request, click the edit icon next to a media booking under Media Requests, and follow the steps in Manage bookings.
Delete a Media Request
To delete a hold, a declined ILL request, or a declined Media request, use the delete icon,![]() .
.
Processing Needed for Holds
The Processing Needed icon (  ) appears when:
- Holds and ILLs need to be approved.
- Holds are ready to be pulled from your shelves.
- Transactions such as recommendations, library review comments and digital content uploads, need to be approved.
- Transfers need to be received.
See Manage Hold and ILL Requests for next steps.
Set Up Hold Notices
|
Important: An email server must be set up for email options to appear. Only the Destiny Administrator can set up an email server. For steps to set one up, see Set Up SMTP Settings. |
Once a hold is available, you can create a notice to let the patron know the item is ready for pickup.
Use the following steps to generate a hold notice:
- Select Reports > Library Reports..
- Under Holds, click Hold Notices.

- Select a method for identifying the patrons in the Select & sort by drop-down, and then enter a range in the from and to fields.
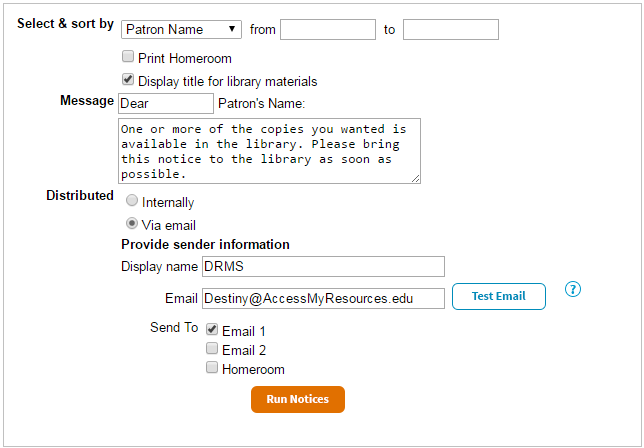
Note: Leaving the from and to fields blank will include all the patrons who meet the criteria you selected in the Select & sort by drop-down.
- Select Print Homeroom or Display title for library materials to include them in the notice.
- Type your greeting in the first Message field, and your preferred text in the field after Patron's Name.
Note: Library Manager automatically fills in the individual patron names.
- Use the following table to choose what you want to do:
If you want to...
Then...
Hand out print notices
Next to Distributed, select Internally.
Send email notices
Note: To use email features in Destiny, the Destiny Administrator needs to set up the mail server. View - Next to Distributed, select Via Email. Additional options appear.
- In Display name, type the name you want to display as the email sender.
- In Email, type the return email address.
- To send a test email to yourself, click Test Email.
- Select one or more of the email checkboxes or Homeroom.
Notes:
- The email options correspond with patron record fields.
- Limit which homeroom teachers receive notices by clicking the Update button that appears after you select Homeroom.
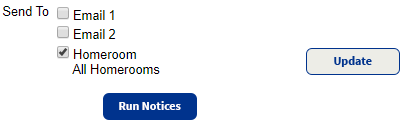
- Click Run Notices. Report Manager opens.
- When the status of the job is Completed, click View. If you selected to email the notices, the report details the success of the transmission. If you selected to print the notices, the report is a PDF of those notices.
Hold Settings
You can define the default priority and the hold expiration dates for each patron type in Admin > Library Policies.
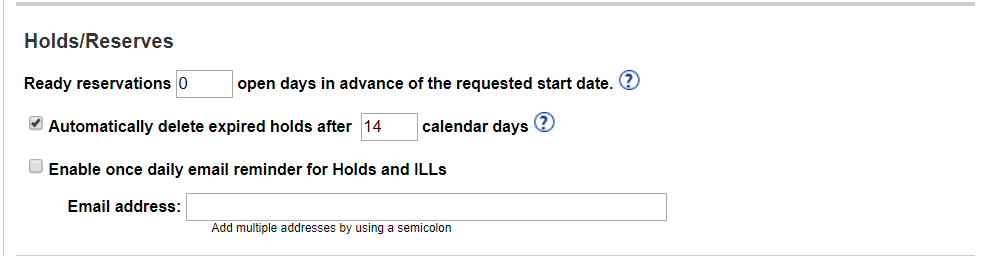
You can define when you want expired holds to be deleted, the number of days to prepare materials, and reminders for holds and ILLs.
- Select Admin > Site Configuration > Circulation sub-tab.
- Select settings:
-
Enter the number of days you need to prepare materials being requested by a start date.
Destiny calculates the lead time based on your Calendar settings and assumes that you will be preparing the materials on Open days only.
Example: If you specify a lead time of two days and your library is closed on Saturday and Sunday, Destiny moves requests that are wanted on Monday from Local Materials Pending to Local Materials to be pulled on the preceding Thursday.
-
Select this checkbox to have Destiny automatically delete expired holds when the Daily Holds Processor runs, usually each night.
Any holds that are deleted are listed on the Daily Holds Processor job summary, which is available each morning in Admin > Job Manager.
Note: You can:
- Revive expired holds, but not deleted holds.
- Edit the expiration date of a hold either before or after it expires.
- Edit the priority of a hold.
- Enable once daily email reminder for Holds and ILLs
Select this checkbox to have Destiny automatically send a reminder for Holds and Interlibrary Loans.
- In the Email address field, enter email addresses; use a semicolon between each recipient.
Note: The Daily Holds Processor job that runs each night sends out the email(s) when there are hold and ILL requests that need processing. To view the Daily Holds Processor job, select Admin > Job Manager.
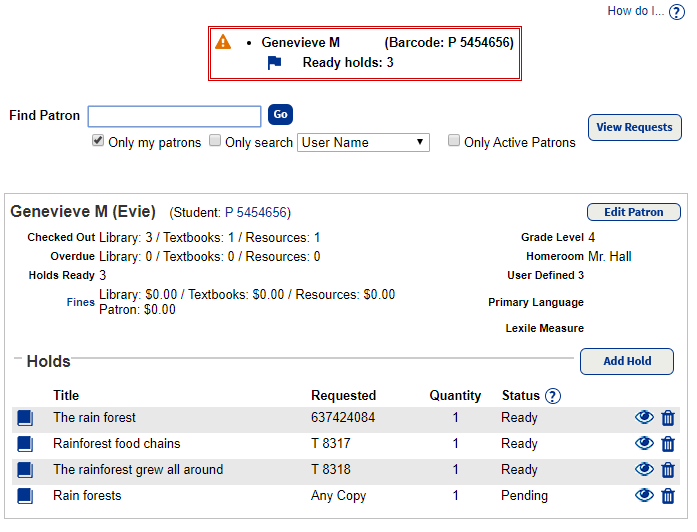
After retrieving a patron, all the titles that the patron has placed on hold or has reserved appear, along with a copy barcode number (or Any Copy) and the hold status.